

DIY solar water heater for swimming pool 2022
The master of this homemade product lives in Canada, so he needs to turn on the heating of the water in the pool for the whole summer, since it is quite cool there.
First of all, you need to determine the place to install the heater. This place should have as much sunlight as possible throughout the day.
Step 1: Materials and Tools


- metal corners;
- copper pipe with a diameter of 32 mm and a length of 162 cm — 2 pcs;
- 3-4 rolls of copper pipes 6 mm;
- Tin solder;
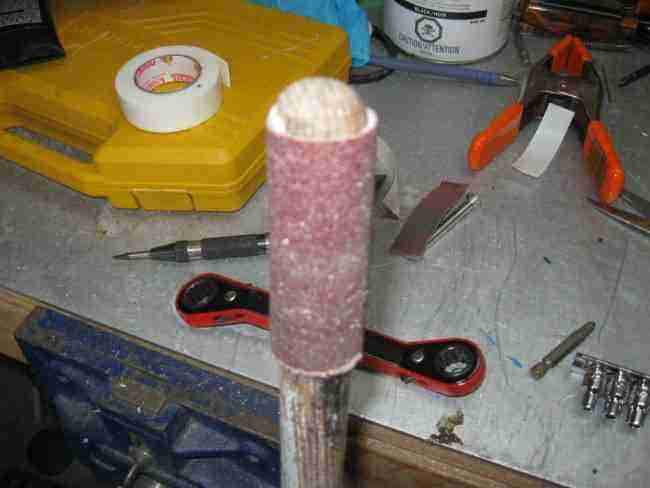
- skin;
- Solder paste;
- Welding torch;
- Pipe cutter;
- lace;
- Automatic center punch;
- Pencil;
- roulette;
- cutting;
- Acetone or other cleaning agent that can remove solder paste;
- fumlenta;
- copper perforated tape;
- countersink;
- Double-sided tape;
- black paint;
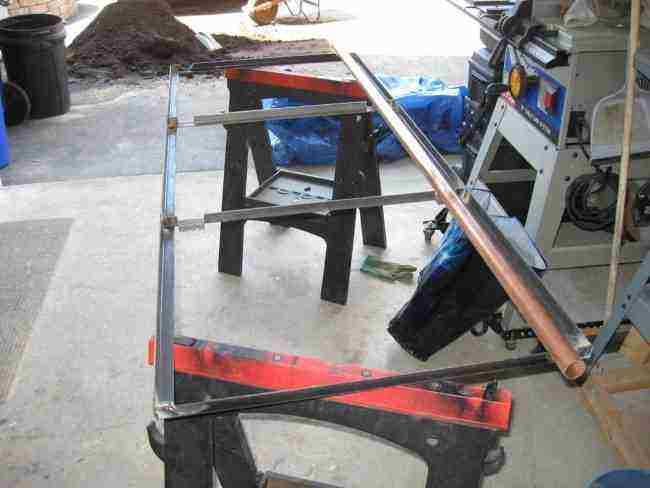
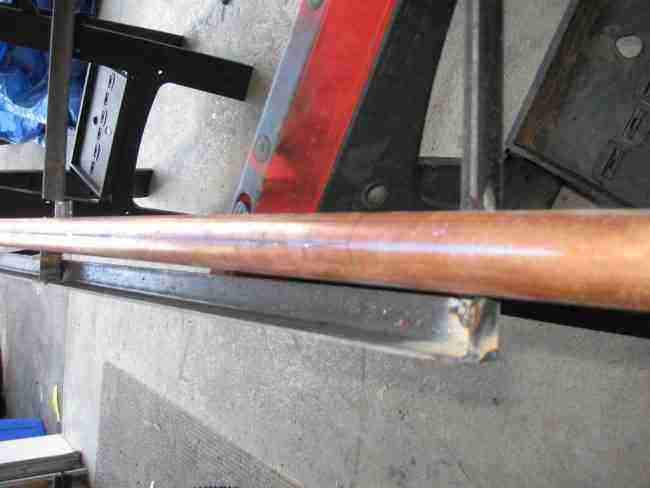
Step 2: Creating a frame for fixing pipes
You can build a frame from wood or other material, but the master decided to build it from a metal corner.
Cut the corners along the length of the pipes to make a rectangle. On the shorter side, the craftsman made several cuts with a hole saw to fit the pipe.
Step 3: Drilling the manifolds
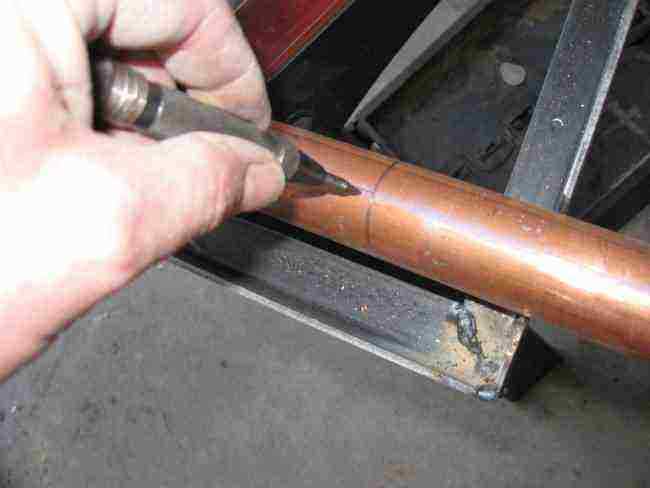
Drill 6mm holes. in a straight line in a pipe with a diameter of 32 mm to make two collectors. The master drilled holes every 50 mm. a total of 63. To make a straight line, he used a shoelace.
Insert the pipes into the frame so you can see where the holes start and end.
This way you won’t have extra holes where the manifold pipe will attach to the frame.
The craftsman calculated that 63 holes in a 6mm pipe would have a diameter 3 times the diameter of a 32mm pipe. This is done so that in small pipes the flow of water slows down a little.
Slowing the flow of water helps heat transfer…
Step 4: Drilling
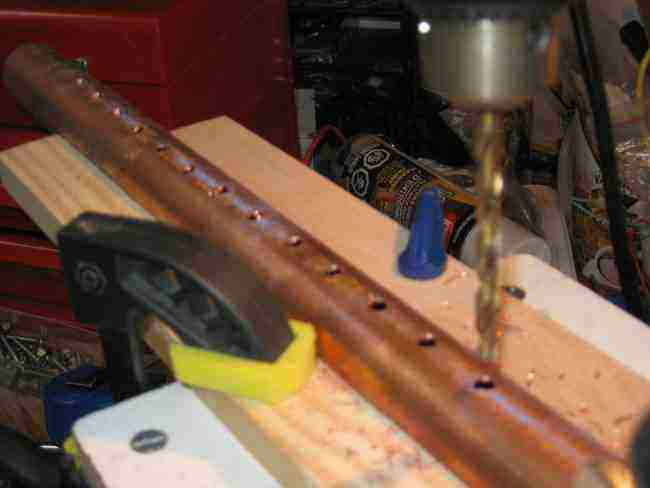
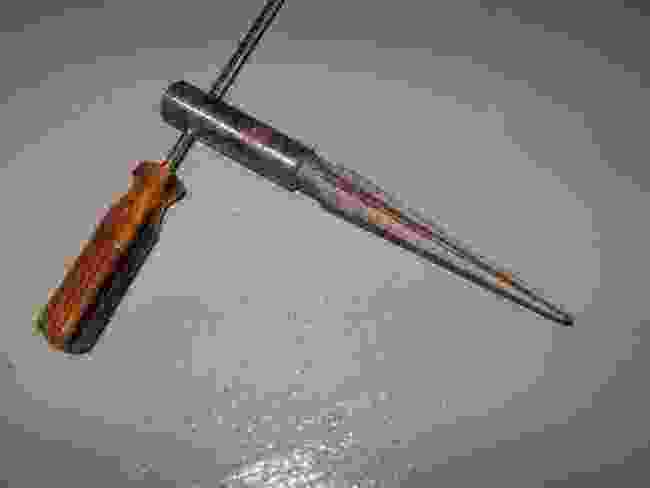
The master made a conductor to align the pipe in a vise. The pipe is pre-marked and punched with a center punch.
A total of 126 holes were drilled (63 per pipe).
Drills do not make perfectly round holes, so use a countersink to make it rounder so that it fits as closely as possible to 6 mm pipes.
To mark a perfectly straight line on the pipes, fasten them together with clamps, and then use string to mark where the pipes touch each other.
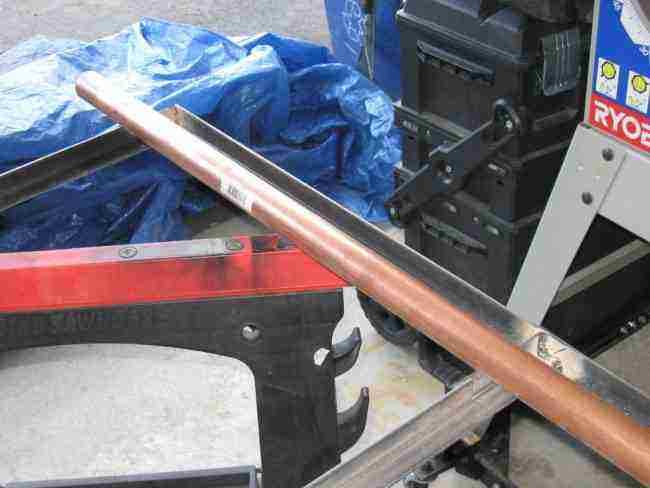
Step 5: Cut and fit 6mm pipe
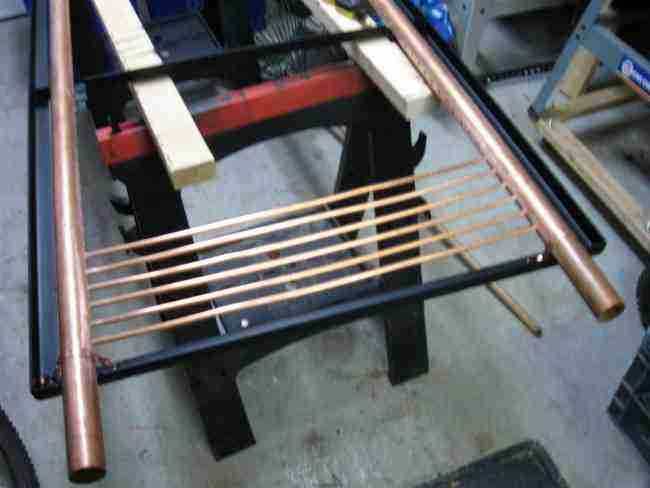
Unroll and cut the 6mm pipe to size. Make a jig and try to straighten the pipe by slowly bending it back. It is advisable to install and fix 32 mm pipes to the frame. Make sure the distance between the pipes is the same.
Cut the 6mm pipes so that they are about 2cm longer than the distance between the 32mm pipes.
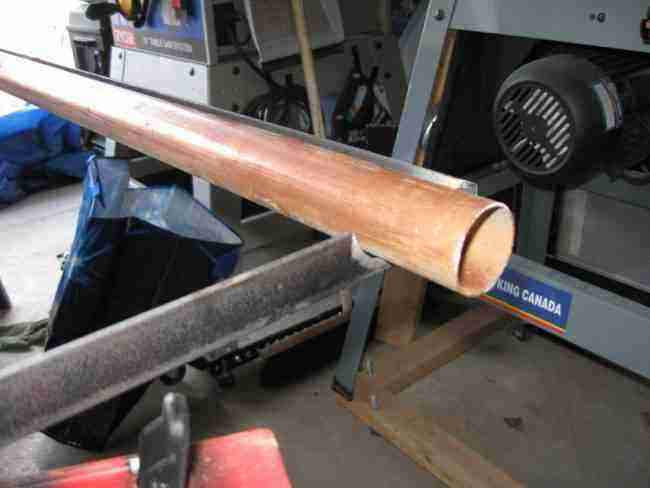
Step 6: Prepare for Soldering
As with any copper pipe plumbing job, the copper must first be prepared.
Take your sandpaper and sand down the oxidation where the pipes will need to be soldered together.
Sand the inside of the 32mm pipes.
Attach some sandpaper with double-sided tape on the handle and sand the inside of the pipes.
Sand all 63 holes of 6 mm pipe.
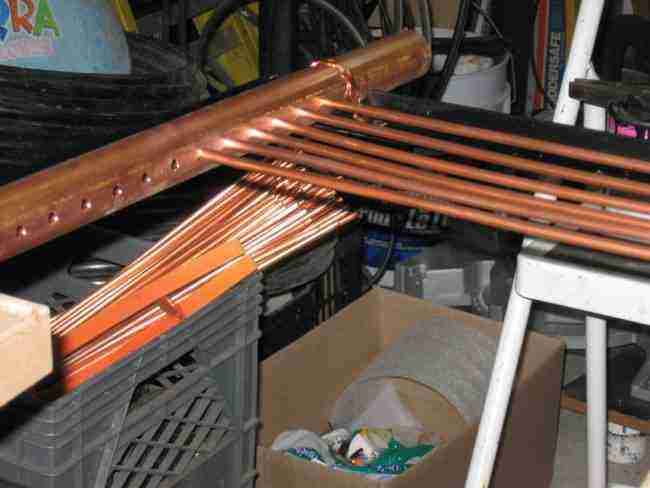
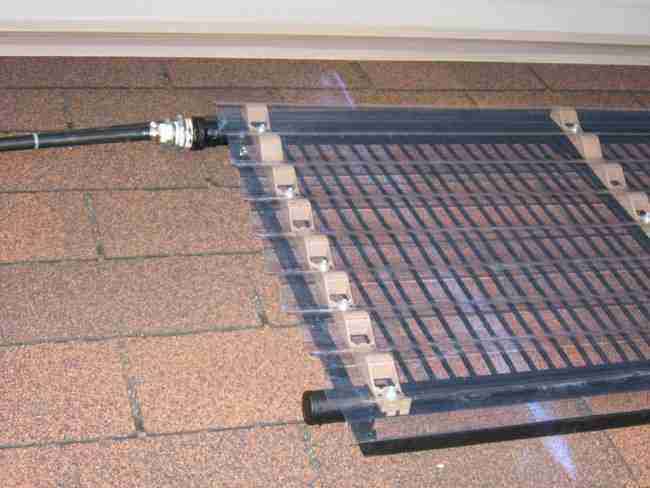
Step 7: Assembling the Small Pipes in the Manifold
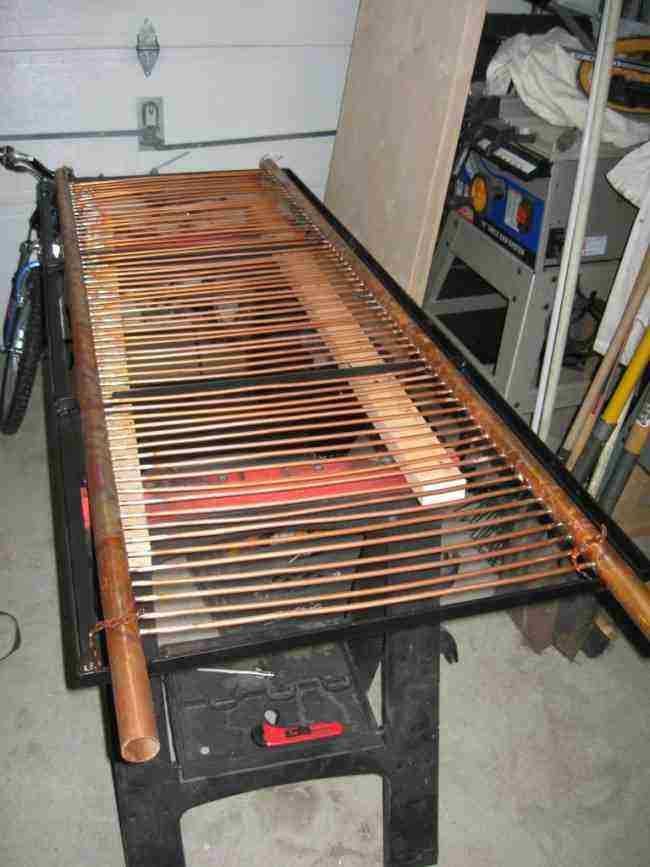
Insert each 6mm pipe into the hole on each side. Insert the small pipes into one large pipe and the other ends of the small pipes into the other large pipe. You can insert a wooden needle to align the pipes from the inside.
Step 8: Soldering the pipes

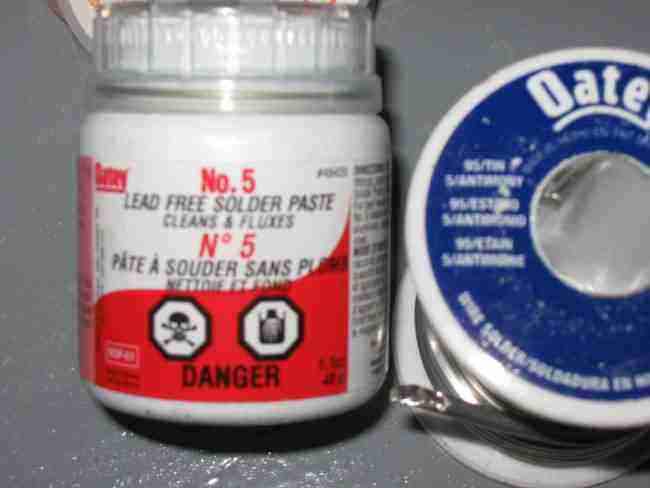
Use solder to solder 32 mm pipes with 6 mm.
Soldering is a matter of precision and patience. It took the master about an hour and a half, he is not a professional.
At two opposite ends (one on top, one on bottom), solder 32mm fittings to allow the adapter to be screwed in, from 32mm to 20mm.
The other ends will have a welded cap.
Note that the water must enter from one side of the first manifold and exit from the other side of the second manifold.
Step 9: Pressure test
Before going any further, it would be a good idea to do a leak test.
Connect a hose to one of the 32mm pipes and a small piece of hose to the other pipe.
You can install an adapter 32/20 mm.
Turn on the water to expel the air.
After the air has escaped, transfer the exhaust hose.
Check each solder joint for leaks. If there are any, completely empty the heater and have it repaired.
Step 10: Cleanup
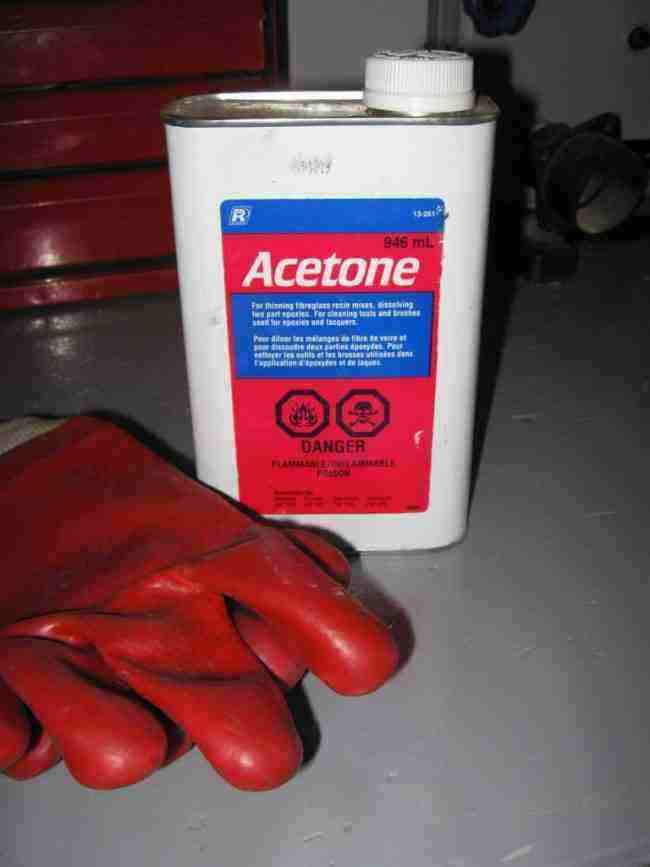
Use Acetone to clean up any remaining solder paste. This will prepare the metal for painting.
Step 11: Painting
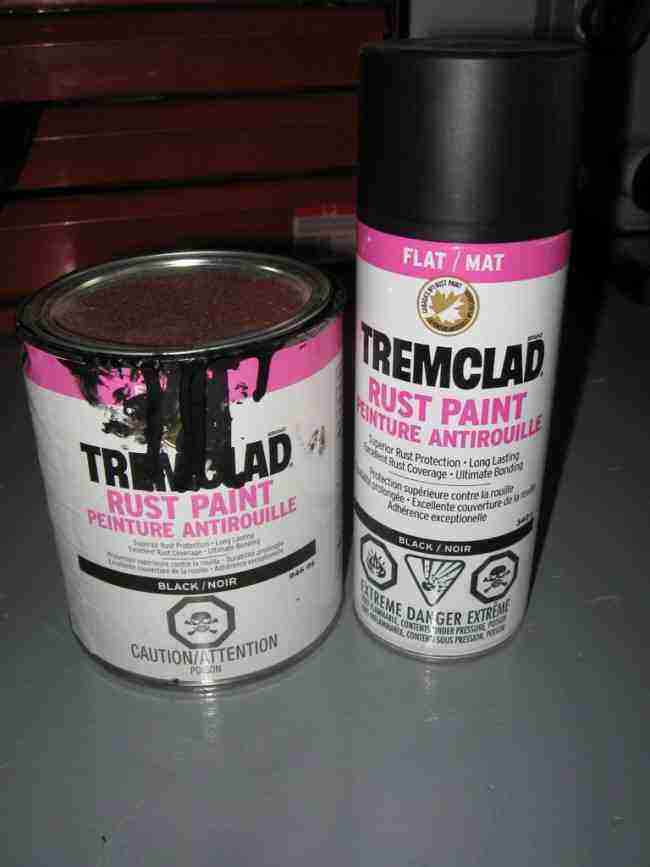
Use black matte paint, spray can, or regular paint. The master used both paints. Copper spray because this paint is easier to spray on small pipes. For the steel frame, the master used a regular brush and paint from a can.
Step 12: Final Assembly

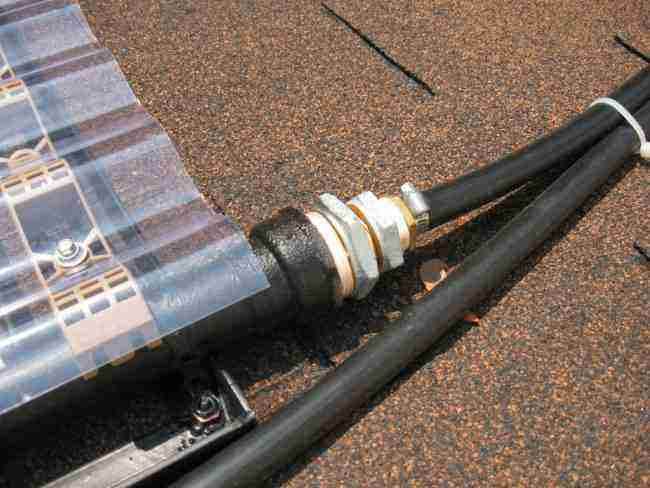
Assemble a 32/20 mm adapter to reduce the cross section of pipes.
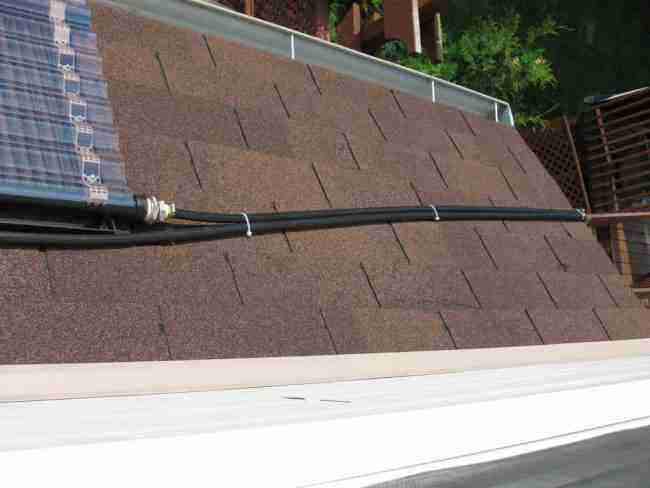
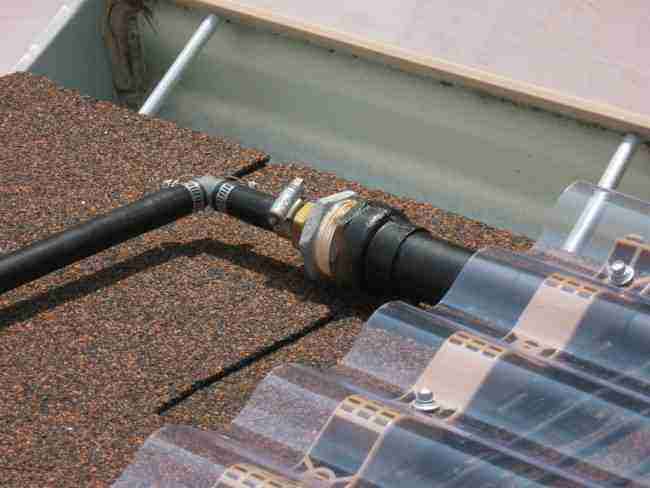
Step 13: Installation
Find a good spot with maximum sunlight all day.
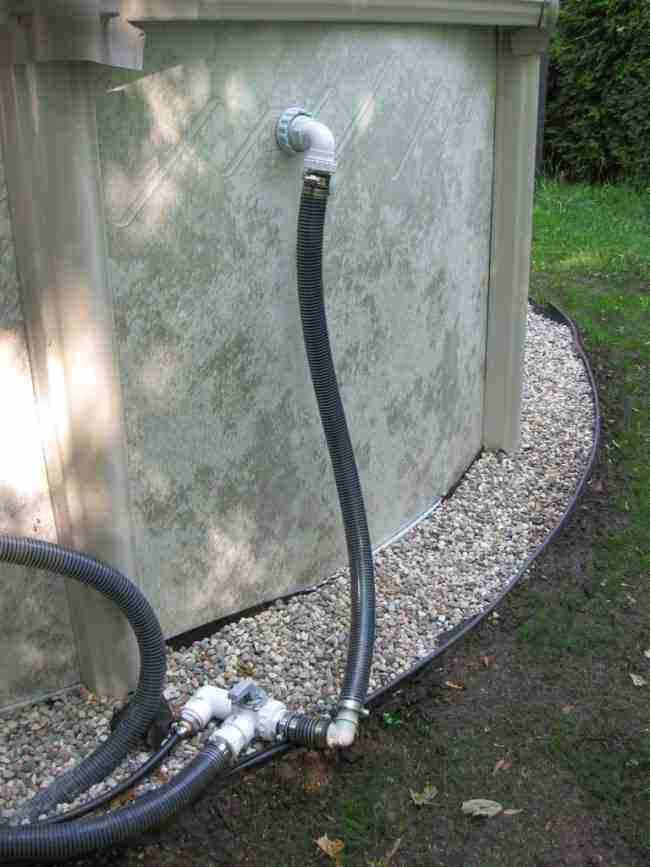
Install the water heater on the roof or in any other place convenient for you.
Use a 20mm plastic pipe from the pool pump filter outlet to the bottom manifold.
From the top collector 20 mm the pipe has a return to the pool.
You can use flexible universal, inexpensive hoses.
You can use 90 degree angles to make it easier to run hoses off the roof.
Step 14: Installing a 3-Way Valve
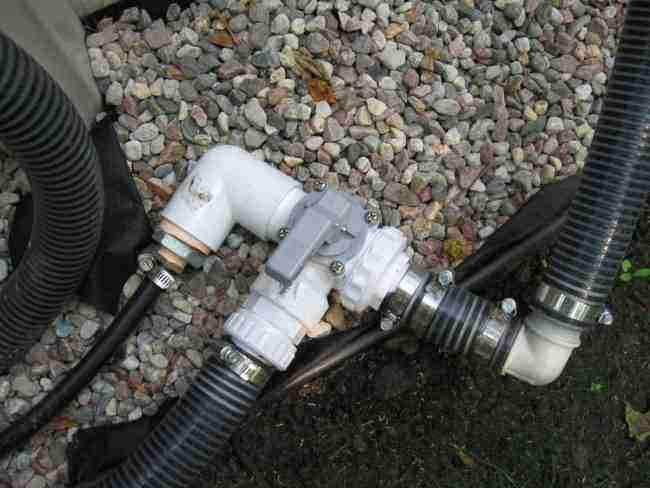
Install a 3-way valve. Insert it between the filter and the pool return pipe.
Insert the pipe leading to the water heater onto the three-way valve.
With this faucet, you can regulate the flow of water entering the heater.
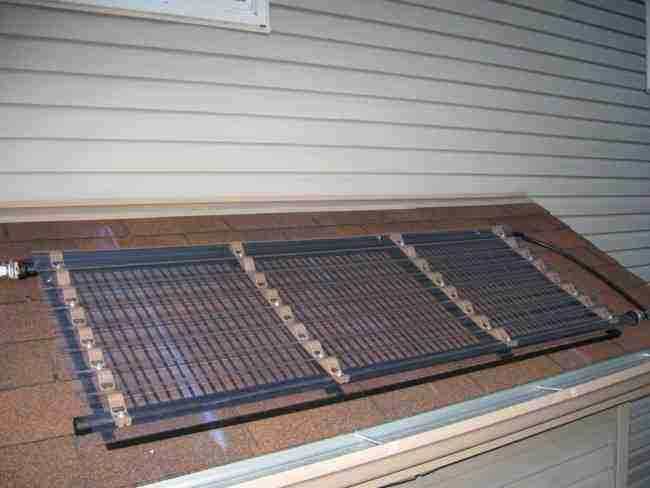
Step 15: Final Result

Cover the water heater with corrugated polycarbonate, it is much cheaper than plexiglass.
This solution is necessary in order to protect the fragile 6 mm pipes from deflection under the weight of snow in winter, since the water heater is not planned to be removed.
According to the efficiency of the solar water heater:
Delta T (temperature difference):
With an outdoor temperature of 21°C and a pool water temperature of 17°C, the heater turns water from 17°C to 22°C in one day.
The water leaving the heater is approximately 3°C warmer than the water entering.
Keep in mind that this data was recorded in the last weeks of May in Canada.
The sun hits the water heater on the roof from 10:00 to 15:30, that is, 5.5 hours.
Anyone in a warmer, sunnier environment should get much better results.
I also added some black pieces of metal under the 6mm pipe and closed them on the sides to get more heat.
Step 16: Swim. 2nd week of May

For any south, sailing in May is normal, but for Canada it’s an exception…
The average temperature outside does not exceed 21°C.
Pool specification:
— 132 cm high;
— two-speed pump with filter;
Heater location
It is on a small roof above the balcony, about 5.5 m higher than the pump.
First you need to pump water into the heater at the second speed. As soon as it is full, the pump must be switched to low speed, and then it’s up to gravity.
