


DIY high efficiency solar collector
Introduction.
It is a pity that there is practically no normal article on the Internet on how to make a highly efficient solar collector with your own hands. Basically, the Internet is littered with all sorts of nonsense, such as how to make a collector from a refrigerator radiator or from plastic garbage. It may be a good solution for a summer house, but such a solar water heater will not work for us for normal operation, since I plan to use my collectors to maintain heating and hot water in my house. What will come of this, you will definitely find out in future articles!
Today, I can say with confidence that my collector is quite good. First, it is completely copper. Secondly, it is covered with a homemade selective coating, although not the most effective, but better than black matte paint.
In cloudy weather, in February, it heated up to + 40C, and in the presence of the sun it boiled water. Recent heating tests have shown that the collector, when dry, at +35C outdoor temperature (in summer) heated up to +156C, under direct sunlight and single glazing.
It is unfortunate that the article is still «tight» issued by search engines. At the request «solar collector with my own hands» I am far from being on the first pages. If you really liked this article, and you learned something useful and interesting, feel free to share a link to my article somewhere on the Internet. Let people know that every amateur can make a good solar collector with their own hands! I described everything in great detail, and if you have any questions — ask them on the forum, I will be happy to answer.
Let’s start…
The idea of using solar energy «on the ball» has been troubling me for a long time. When I started looking for commercial offers from various solar collector companies, I realized that there is no such thing as a free ball! All companies, alas, voiced very immodest figures …
I am a person with an average income, and I probably am not able to “lay out” such an amount for a solar installation. Since, since childhood, he loved to craft, he began to think about the idea of \u200b\u200bmaking a solar collector with his own hands. But not so primitive, which would only work in the summer, for the shower, but such that it could warm the water in the winter — in the presence of the sun, of course!
I have read a lot of forums, reviewed videos on YouTube, even read books 🙂 And so I decided. I must say right away that my collector, although self-made, is not very directly free — non-ferrous metal, it has always been not cheap.
Making a copper absorber
An absorber is an absorbing panel that absorbs solar radiation and heats up! No solar collector will work without it — this is its basis! It was decided to make a copper absorber for three reasons. The first is the ease of working with this material. Easy to bend and solder at home. The second is high thermal conductivity, which is important for an efficient collector. Third, selective coating can be directly obtained from copper, black oxide of copper II — CuO. There was a significant drawback — this is the price. After reviewing all the offers on the Internet, I found a price of about 110 UAH per kg. It was a copper tape, 0.2 mm thick and 30 cm wide. Its length seemed to be unlimited. I ordered 8 meters of tape for myself, which amounted to about 4.4 kg and cost me almost 500 UAH with delivery!
I soldered the radiator from two pipes, 125 cm long with a diameter of 22 mm and 10 pipes 2 m long and 9.5 mm in diameter (sold as 10 mm). I managed to find these pipes inexpensively 🙂 Thank you kind people!
copper absorber.

General view of the radiator. Thick pipes — 22mm. Thin — 10mm.
In thick pipes, I drilled holes with a diameter of 9.5mm every 10 cm. Then I inserted thin pipes into the holes obtained so that they did not stick out very deep inside the thick pipe (otherwise there would be strong hydraulic resistance). The pipes protruded a maximum of 5-10 mm. Then I soldered the whole thing. Soldered pipes for the first time in my life. I used SANHA soft solder and flux from the same company. He soldered very easily. I used the most inexpensive gas burner TOPEX. Although no! They were cheaper, without a piezo element — I decided to buy with a piezo!
Pipe joints.

It turned out to be expensive to use special adapters.
The solar collector must not leak!!!
When the whole radiator was soldered, soldered two plugs and two 3/4 inch threads to the ends. Soldered diagonally. After that, I screwed a plug on one side, and a fitting on the other so that a hose from the compressor could be put on it. I filled it with water and started to pressurize. I pumped about 7 bar into it. The radiator didn’t leak anywhere — the only exceptions were threaded connections — apparently it didn’t wind up a lot of tape. It is better, of course, without water, but simply with air, and place the soldered joints in a container with water — then air bubbles will immediately let you know about poor soldering. I did not have such a capacity — so I poured water into the radiator.
Absorber and 3/4 thread.

3/4 inch thread. On the other hand, the diagonal is exactly the same.
After successful crimping, I proceeded to solder the copper tape. If it took me 3-4 hours to solder the radiator, then the next process took me three long and painful days! I cut the tape into strips of 1m. I cut 7 strips in total. And then soldered them into one common canvas. Soldered with an overlap of 5 — 10 mm. As a result, I received a canvas measuring approximately 1mx2.07m — it took a whole day.
Copper tape.

Two strips of pure copper tape. Length 1m. Width 30cm.
The copper tape is soldered.

All stripes together. Left — 4 victims of blackening experiments. Washed with phosphoric acid. Next 3 «clean» strips.
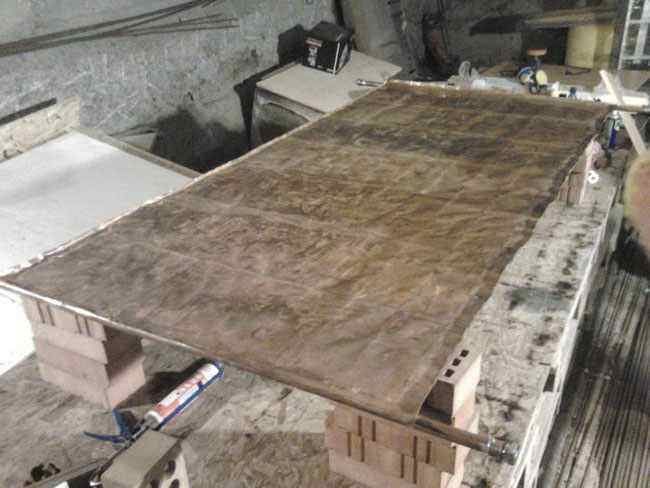
After that, having gained strength, I proceeded to solder the canvas to the previously made radiator. For good heat transfer, it is necessary to solder not a blunder and here and there, but normally, along the entire length of the pipe! In total, we got the task of soldering 20 meters of pipes. I soldered with a hairdryer until I ran out of expensive SANHA soft solder. Next, the gas burner and the bazaar (self-made) solder ala POS 40, which was soldered very hard, went into the entrance. The father’s solder was also used, some of which soldered normally, and some barely. In general, the solder probably took 500 — 700 grams, but it is not very cheap. For example, 250 g of good SANHA solder cost me 160 UAH. Bazaar is much cheaper, and father’s is free 🙂
Solder absorber.

He pressed the pipes with a stack of bricks. Also carefully, without fanaticism, leveled with a rubber mallet. Held his hand…
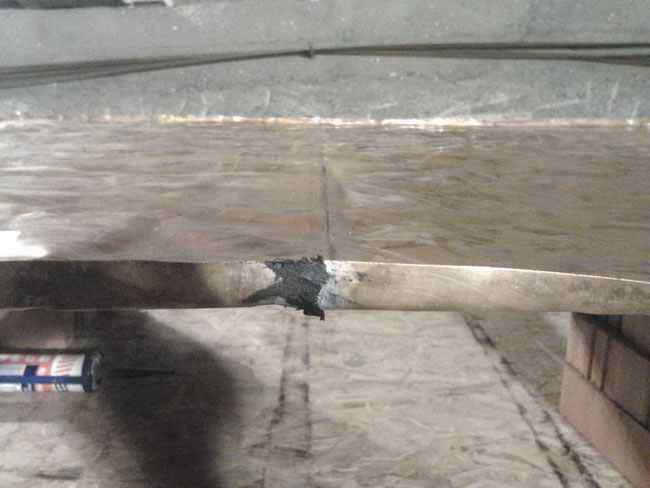
Separately, I want to say about the junction of the copper tape and thin copper pipes. The tape, from temperature expansions, leads very strongly, it becomes all wavy and bumpy. Therefore, the pipe must be well pressed against the tape so that the gap is minimal! And just in this gap should get the solder. This important process took me 2 full days, interrupted for lunch.
Gap between pipe and copper tape.
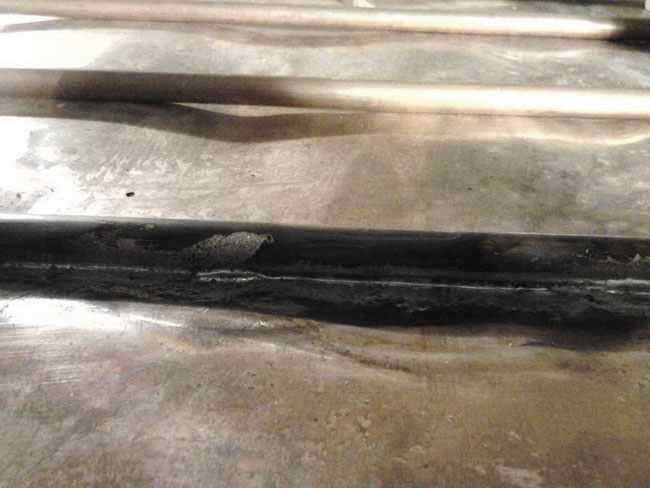
The soldered tube and the still free tube are visible. Such gaps in the free pipe are not allowed. It should be pressed as tightly as possible to the tape.
That’s it, soldering has been completed! So far, I have concerns about using soft solder. Its melting point is 180C. But the idea is to endure. Practice and the hot summer of Odessa will show.
Assembled copper absorber.
3 days of work. Soldered!
The ballad of blackening — do-it-yourself selective coating.
It is clear that the absorber should be left as is — that is, the copper color is not very good. Copper itself (or rather, its Cu2O oxide film) is a good heat sink (yes, ordinary red copper, in theory, even better than ordinary heat-resistant paint), but this film is not very stable and can further collapse — oxidize. As a result, you can get a blue-green absorber. I will not go into the theory of highly selective coatings here. The easiest way is to simply paint copper with black heat-resistant paint.
I saw a video on YouTube: where a person had such collectors also boiled water (coated with ordinary heat-resistant paint), but according to the weather — it was either summer or a good spring. Yes, and the number of collectors are simply obliged to boil it 🙂 To get a more efficient collector, it is better to cover copper with copper oxide 2 — CuO — firstly, this coating is black and has a good absorption coefficient (from 70 to 90%), and secondly, it has a rather low emission (radiation) coefficient. If you believe it, then this is from 5% to 20%, depending on the thickness of the film itself. That is, it is a good selective coating that can be obtained at home. Naturally, it cannot compete with the factory coating, but in theory it should be better than black paint (which has a good absorption coefficient and a high emissivity of about 80% — which is bad for a solar collector). There are special selective paints — but it will probably be more expensive to buy them than to coat copper with CuO. Although the process of applying CuO is much more difficult than just painting. Somewhere so…
I settled on the blackening of copper, i.e. obtaining CuO on the surface of my absorber. I must say right away that I was busy with him for about 3 days, not counting the preliminary test experiments.
A little chemistry.
It is necessary to obtain CuO by oxidizing the copper itself, from which our absorber is made (soldered). It is not necessary to apply it with a brush or a roller 🙂 And so, what poisons are needed for this:
First way:
Caustic soda (caustic soda NaOH) — 50-60 g
Potassium persulfate (K2S2O8)————14-16 g
Water 1l
Second way:
Exactly the same, but instead of K2S2O8, (NH4) 2S2O8 (ammonium persulphate) is used
Third way:
Caustic soda (caustic soda NaOH) — 100g
Sodium chlorite NaClO2 —————— 50-60g
1 liter water
For all three methods, 2 more mandatory conditions are clean, fat-free surfaces and the temperature of the solution and the surface is about 60-65C. And yet — the solution must be freshly prepared, since the oxygen that is released as a result of the reaction quickly evaporates. It is better to take distilled water.
Don’t forget about safety.
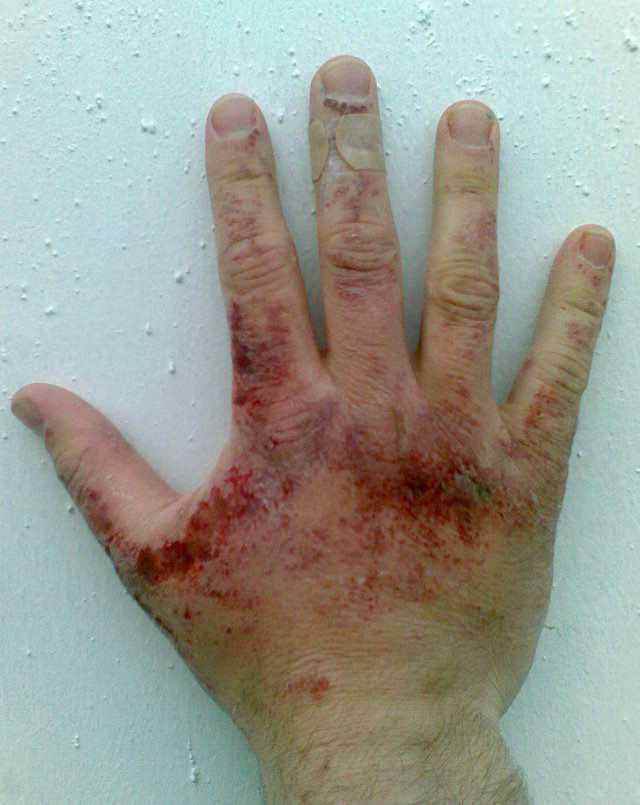
Caustic soda or NaOH — loves organics very much — that is, you !!! Corrosive to skin and eyes. In no case do not take it and its solutions with bare hands and protect your eyes with goggles. Use rubber gloves. When NaOH is diluted in hot water, it “boils” very violently.
This is how you get chemical burns. Be careful!!! The hand is not mine.
Ammonium persulphate or (NH4) 2S2O8 releases ammonia when heated. Don’t even think about using this method indoors without gas protection. I had to buy a gas and dust respirator that said «ammonia protection» because I used this method. Without a respirator, I probably would not have finished my collector 🙂 In summer, most likely, it is possible in the open air without a gas mask, but do you still need to maintain the temperature? And believe me, she needs it. Without heating, chemical reactions are very slow.
Dust and gas dust respirator.
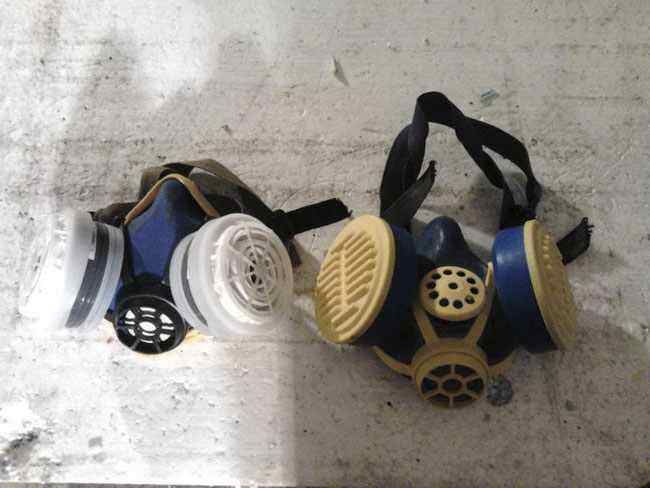
On the right is a regular dust respirator — it will not help you. Left gas and dust — what you need!
Sodium chlorite (not to be confused with sodium chloride — this is common table salt) or NaClO2. It seems nothing dangerous, but to be honest — I’m not sure. It is better not to take it with bare hands, a little chlorine is released. I managed to get it for the initial experiments. Things really then all stink of chlorine, but you can live.
Potassium persulfate, also known as potassium persulphate or K2S2O8, is probably the safest method. But it was expensive to get it and by mail. So I have not tested this method and can not say anything. In general, all reagents can be found (ordered) on the Internet. I bought in Odessa — there is a TOR company. You can buy almost any chemistry there … I washed off the unsuccessful results of experiments with orthophosphoric acid (it is often used as a flux for soldering copper, it is also one of the main compositions of Coca-Cola drinks). This acid easily washes away our vaunted CuO!
How do I ink?
Initially, the idea was this. After soldering the absorber, I bent its edges and got such a healthy saucer. The lower joints, just in case, missed the sealant for fireplaces. A bucket with a boiler, two pipes are lowered into it — supply and return. The pump (I bought a circulation pump) was supposed to drive hot water from a bucket through our collector, heating it. Next, I wanted to pour the freshly prepared solution into this heated «saucer» and voila! But nothing happened. Firstly, the circulation pump can only drive water in a closed circuit. Raise water from an open container — a bucket, at least 10 cm he is not capable. Secondly, I soldered the sheets not very tightly (which is why I missed all the joints with sealant), but here’s an ambush — the sealant turned out to be water-soluble !!! In short, my saucer should have been more correctly called a colander for pasta. In!
Absorber with curved edges — saucer
The working surface of the absorber. Curved sides are visible.
Absorber — side view.
Side view. The black spot is the same sealant.
Bottom view.

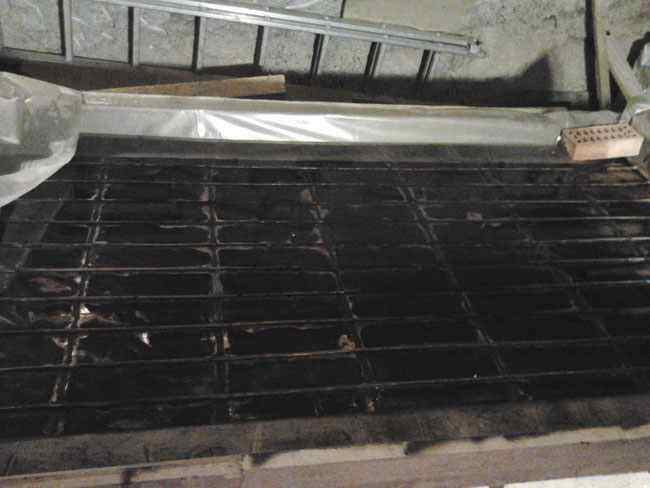
Therefore, I took the most difficult path — it was to make a bath in which I could put the entire absorber completely and pickle it there. For such sizes, it took me about 30 liters of mordant. To heat this amount of water in a cold, unheated basement was quite «exciting».
Why don’t I ink strips separately? After all, at first glance it is much easier. And then you can already assemble an absorber from blackened copper. Firstly, copper is blackened on both sides at once, so on the reverse side, where soldering is needed, this blackness would have to be washed off. Orthophosphoric acid could easily get on the working side and wash off CuO. Secondly, and more importantly, CuO does not withstand soldering temperatures. It withstands temperatures in the 300C region relatively well, and soldering with a gas burner gives a high temperature. That is, we would get the destruction of CuO in the places of soldering. Therefore, it was decided to solder the absorber, and then completely blacken it.
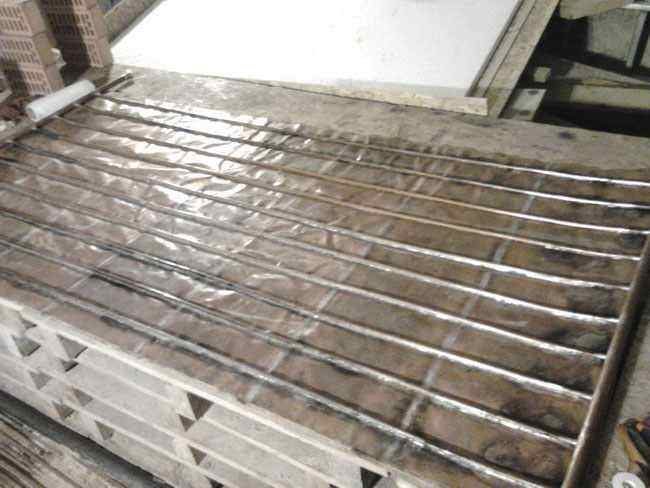
So I did. On a flat plane, I laid out a bath of the right size from what was lying at hand (these are bars and bricks) and covered it with a film. I put the absorber upside down in it (ie, with the back side up). Otherwise, 90 liters of solution would be needed. Yes, and during the experiments, I noticed that the back side of the plates was inked somehow better. Perhaps this is due to the fact that oxygen rose up and ran into copper, oxidizing it.
Absorber bath.
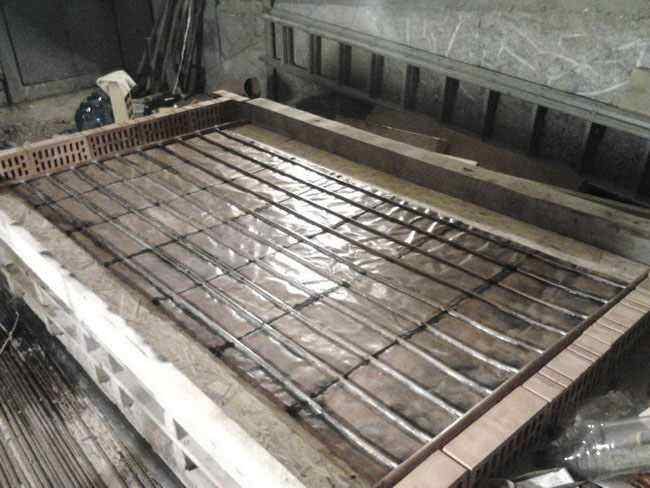
Bath of bars, bricks and boards. Not yet covered with oilcloth — I tried on the absorber 🙂
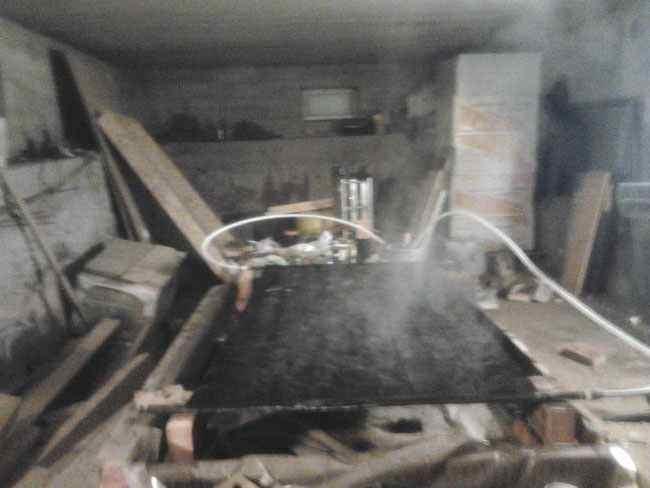
I filled it all with a solution and kept it for an hour, while periodically shaking and shaking the absorber so that air bubbles were removed from under it. About an hour later I did a follow-up inspection — in general, it was all black, but in some places there were still copper spots of a solid size. I left it like this overnight…
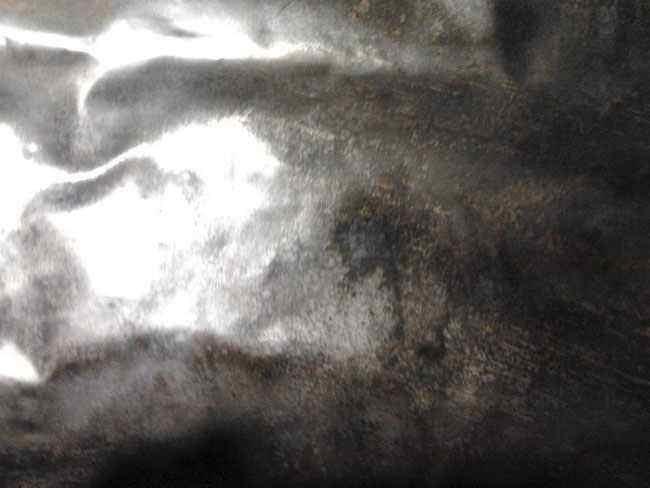
Blackening of copper
The process has begun. To reduce evaporation, I covered everything with pieces of foam and polyethylene.
In the morning I came, ventilated the basement — since it was still impossible to stay in it without a gas-protective respirator. Then he lifted the absorber — and Oh bummer! Copper stains not only did not disappear, but even became larger.
black absorber.
Back side. Failed to take a photo of the front. When I lifted it up, the glass was black water, and the copper spots became much larger!
Next, we had to develop a technique for local blackening of copper. There was a way, which, fortunately, allowed me to patch up all my stains. Firstly, instead of a circulation pump, I borrowed a pump from my mother from a fountain — he did an excellent job with the task — he drove boiling water through my absorber (I hope my mother’s fountain this year will be no worse than in the past. Max is clearly written on the pump 35C). The absorber warmed up somewhere up to 55C. To get a high temperature, 2 boilers were needed, and there was only one available. It was +6C +7C in the basement, so my absorber cooled very intensively. On such a heated absorber, I poured small portions of fresh solution. This made it possible to blacken some areas. But all the same, there were tubercles where the solution could not linger — it rolled down into the recesses. Next, I took a gas burner, heated the desired area, then moistened it with a sponge — while making a characteristic sound “pshshshyyy”. Again warmed up and again with a sponge. It was from the second time that the copper turned black.
Blackening process.
This is the bath I had.
The photo shows a bucket, a thermometer. Not visible — a pump and a boiler. In this way, I warmed the asborrebr.
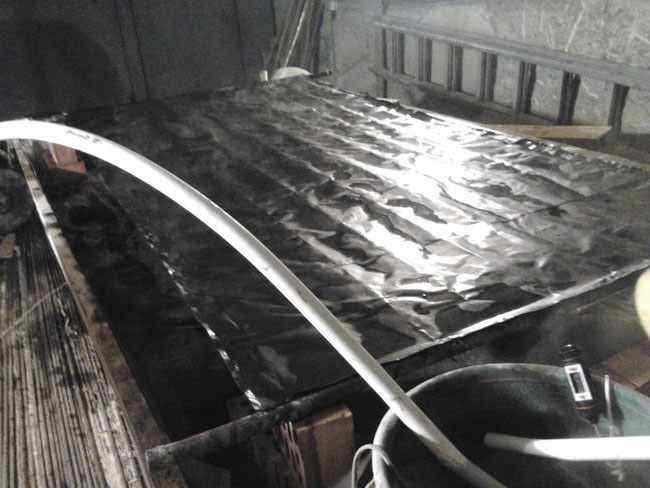
Such is the pain! Then he left the absorber again for the night, pouring it with plenty of solvent. Came in the morning and washed it. The coating was durable, did not peel off and was not erased.
In this state, I left it overnight.
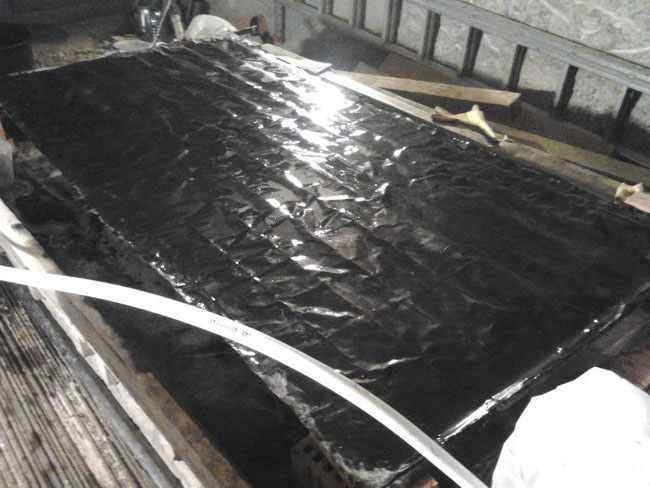
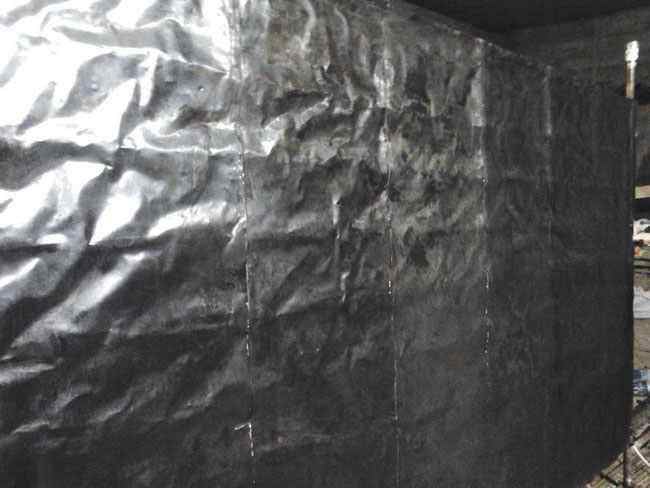
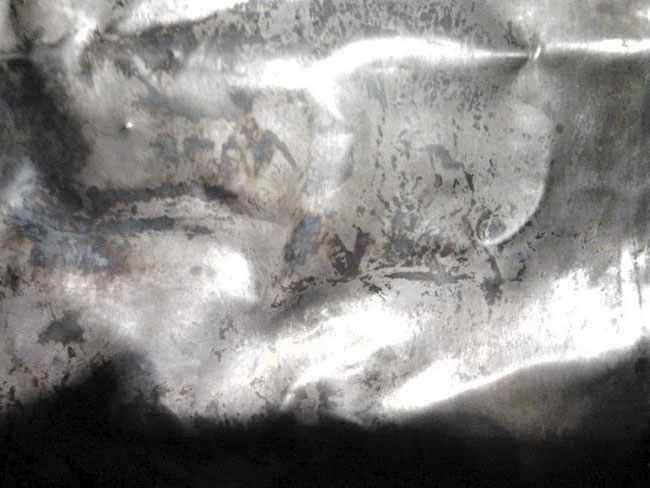
And a few pictures of the washed and dried asborber, without comment.
Case assembly.
In between soldering (for example, I soldered the radiator right away, but I was looking for a copper tape for a week and a half), I began to assemble the body of my future solar collector. I decided to use OCB 10mm plates. Lightweight, durable, inexpensive, waterproof. I cut the plywood to size and assembled the box. For connections, I used such corners.
Corners for the solar collector housing.
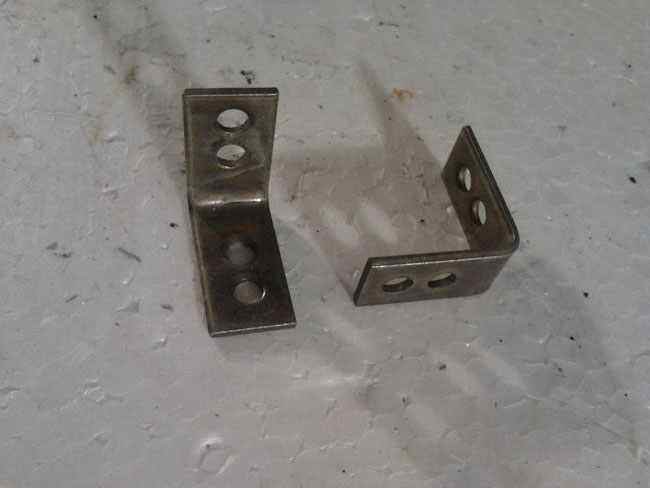
Corners for joining plywood.
collector body.
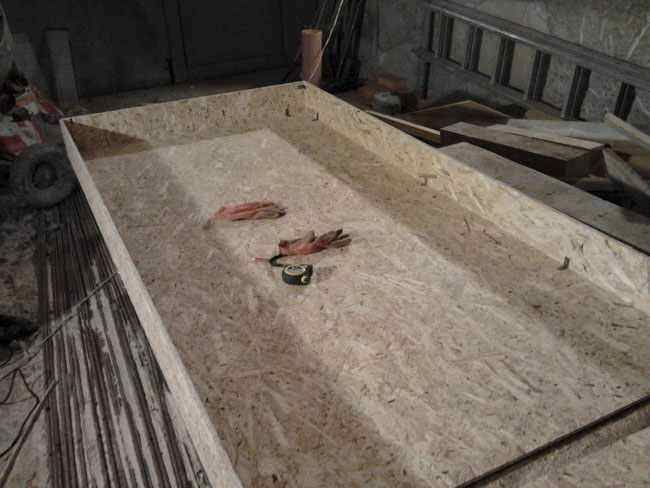
Pre-assembled box. Then I had to take it apart!
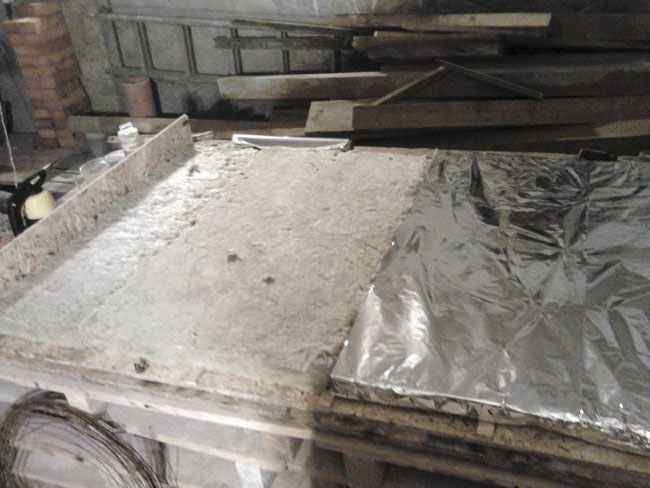
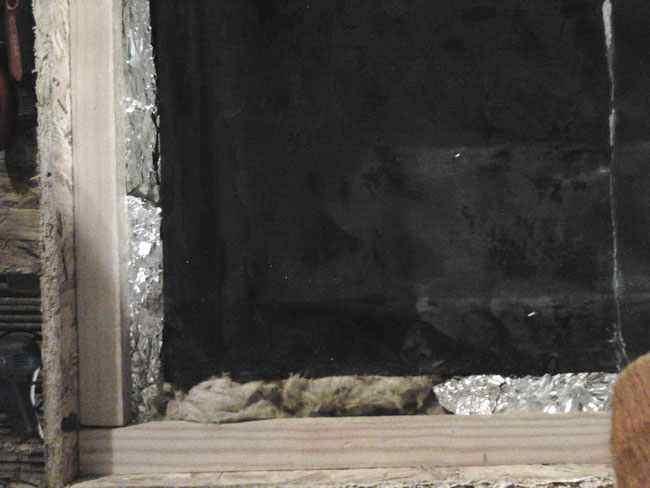
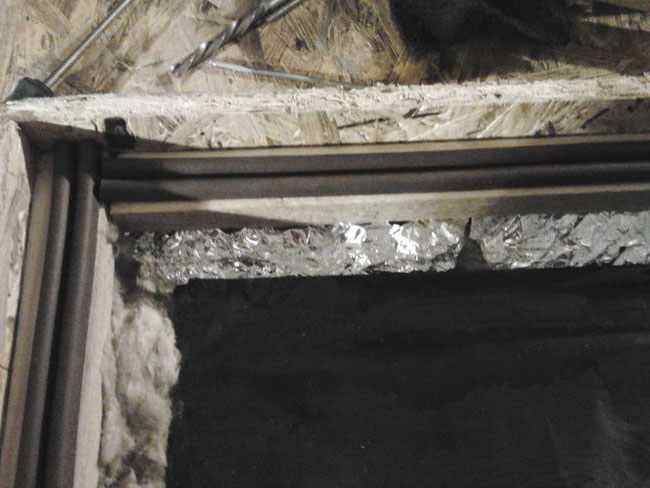
Then he laid thermal insulation — basalt wool, 5 cm thick. The same 5 cm on the sides. He sprayed all the wool with a water repellent (water-repellent liquid) and covered it with kitchen foil. Why foil? I don’t know for sure, but I guess … When I looked at pictures of solar collectors in a section, I noticed everywhere that the absorber simply lies on cotton wool (insulation). That is, the absorber is in direct contact with the cotton! So what??? As far as I know, radiation is 70% of all possible heat losses (radiation, heat transfer and convection). Convection and heat transfer take only 15% each. Therefore, I decided not to irradiate the wool with thermal radiation from the absorber, but to reflect it back to the absorbing panel (absorber). The foil reflects up to 97% of the radiation. To do this, I made an air gap of 2 cm between the cotton wool and the absorber to enable the foil to work as a reflector. If there was no gap, then the foil is useless.
Collector insulation.
First I assembled 3 walls, then started the absorber, laid the thermal insulation of the fourth side wall, and then screwed the side wall itself. It is such a sequence — otherwise I can’t imagine how it can be done!
Ready collector housing.
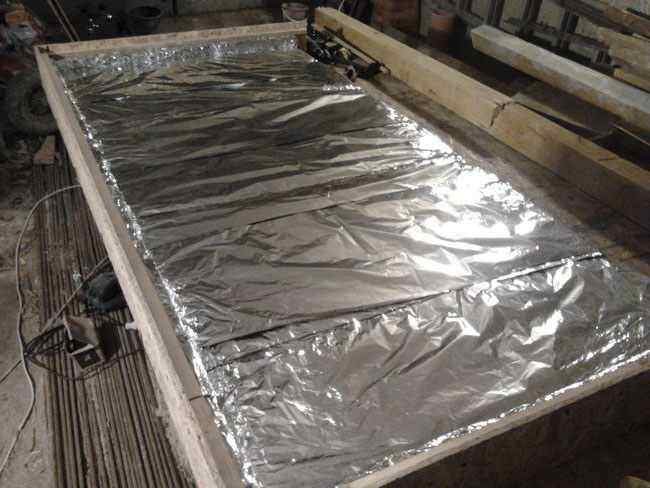
Everything is ready to install the absorbing surface.
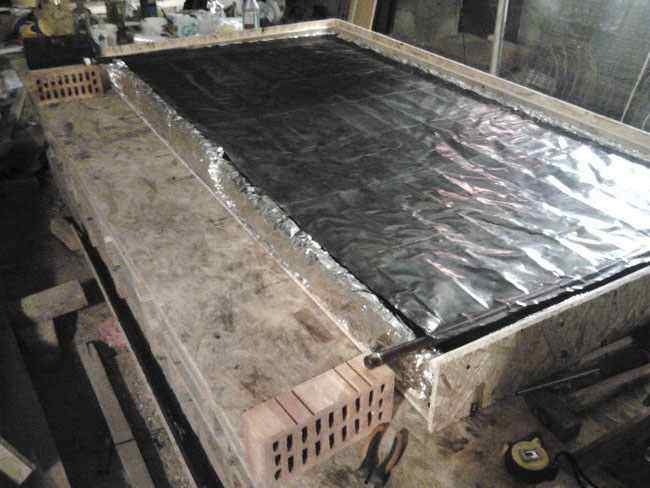
I put the absorber in the box. Then he laid out the insulation. The fourth side wall is not screwed.
Further, it’s easier — I screwed a piping of cut rails around the perimeter and glued them with sealing rubber bands (these are sold for windows and doors).
Wooden edge for glass.
Sealing rubber.
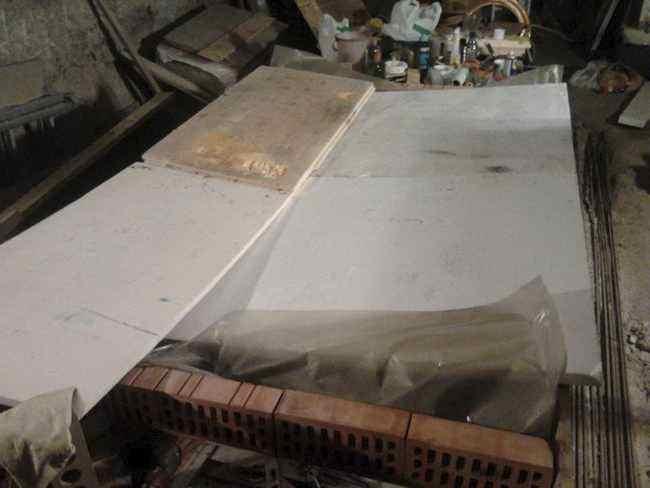
I managed to get free double-glazed windows (again, thanks to kind people!). And 1 m2 of double-glazed windows weighs 20 kg. In total, the weight of the glass turned out to be very impressive — 46 kg !!! Therefore, it was decided to carry the collector to the installation site without glass, and put the glass later, separately. So that the collector does not get dusty, I wrapped it with kitchen cling film. So he left it for a couple of days, until good weather and an assistant appeared. One, I could not pull out such a canoe!
Collector complete!
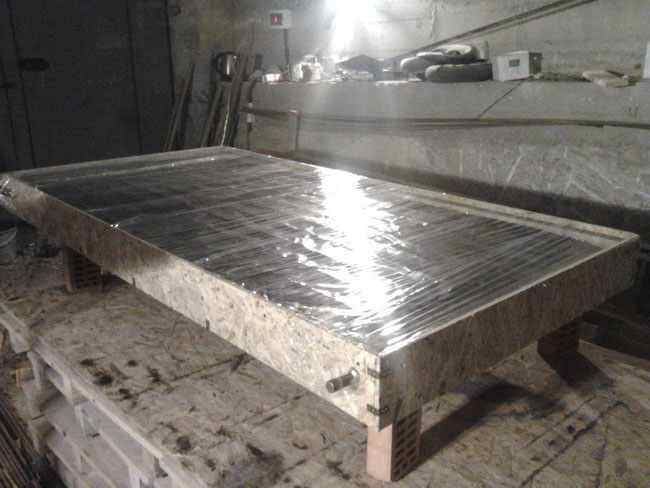
Everything! Ready to install.
First tests.
February 27, +6C. It was quiet, no wind. Solid light clouds, but the sun did not shine brightly. My assistant and I carried my collector to the installation site — the collector itself is very light (wool, plywood and copper), but very overall! Its size is 1.08m x 2.17m. There we installed it, and went to the garage to wipe the double-glazed windows before installing them in the collector. When they took out the first double-glazed window, I took up the pipe — and it was already pleasantly warm! When they took out the second double-glazed window, the pipe became even hotter. When they took out the third double-glazed window, it was already problematic to hold on to the pipe for more than 2 — 3 seconds. No, we did not wash or wash the glass for 3 hours! The whole glazing process took a maximum of half an hour.
Then we started pouring water into it to measure the temperature. After all, it was interesting — so much effort and money was spent — and what is the result?!?!?! At this point, it was just noon, and the sun finally came out from behind the clouds! After the first portion of water, steam began to come out of the collector! To celebrate, I said in obscene language that they say that’s a good samovar turned out! In general, the tests were successful. The collector easily boiled each new portion of water — about 200 g. After topping up a new portion of water, after 10 seconds, boiling water came out of the pipe — the thermometer showed 96C-98C. It is clear that this is not much — but in my opinion, it’s not bad at all for a homemade product?
And finally, more photos with comments.
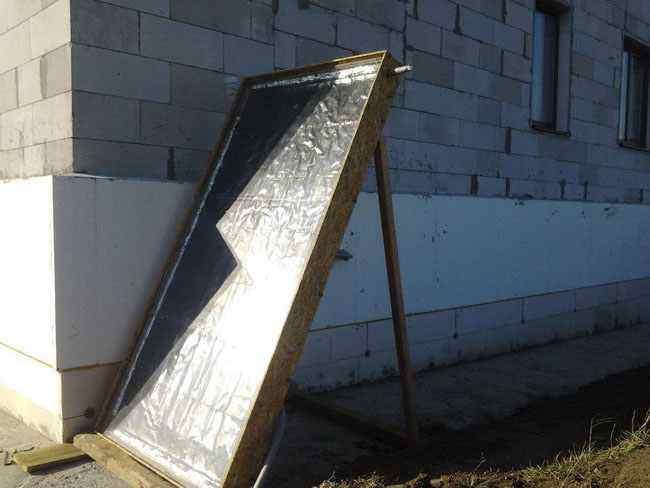
Collector in full growth.
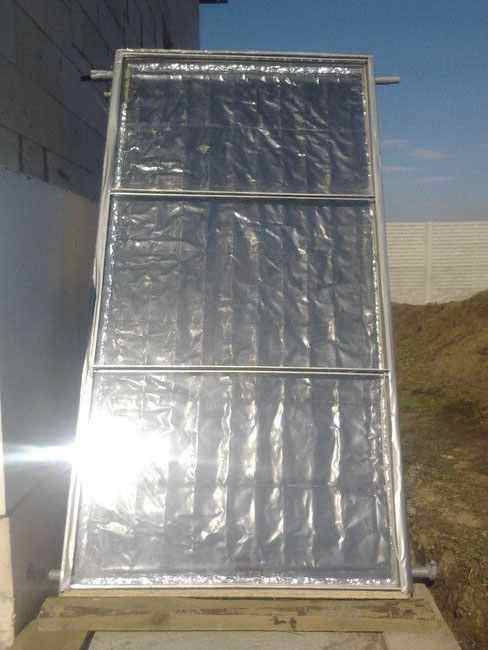
It can be seen how in the morning part of the collector is shaded by the house.
In the stagnation (idle) mode, the thermal insulation does not withstand — it melts.

The temperature at the outlet in stagnation mode. Covering 2 glasses (double-glazed window).
DIY high efficiency solar collector 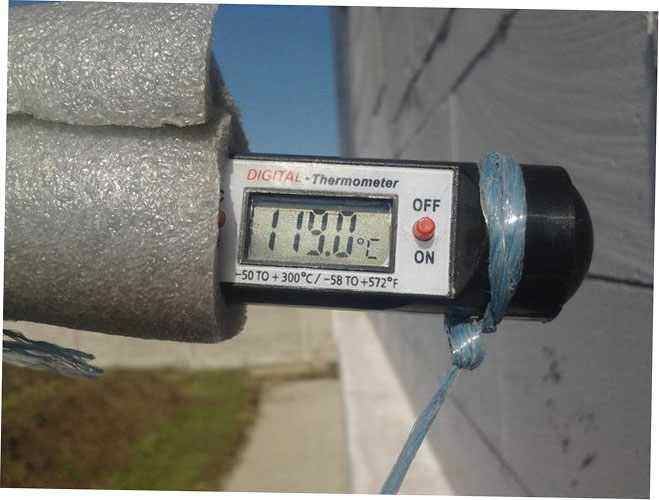 DIY high efficiency solar collector 2022.
