

DIY apparatus for soldering and heating from a microwave transformer 2022
Hello to all DIY lovers. For every DIYer involved in electronics, it is familiar when it is necessary to solder wires to 18650 type batteries, wires are not advised to do this with ordinary soldering, since you can overheat the battery, which in extreme cases can damage it, and since the second option is spot welding , then it is in this article that I will tell you how to make your own home-made spot welding with the least investment, the main donor of which will be the microwave.
A magnetron transformer from an old microwave oven can serve as the basis for an apparatus for soldering copper products, in particular pipes. With the help of the device, you can also heat steel parts, for example, soured fasteners for easy unwinding. It does not require large expenses, time and special knowledge and skills to make it. Any adult can cope with this work.
It will take
Materials:
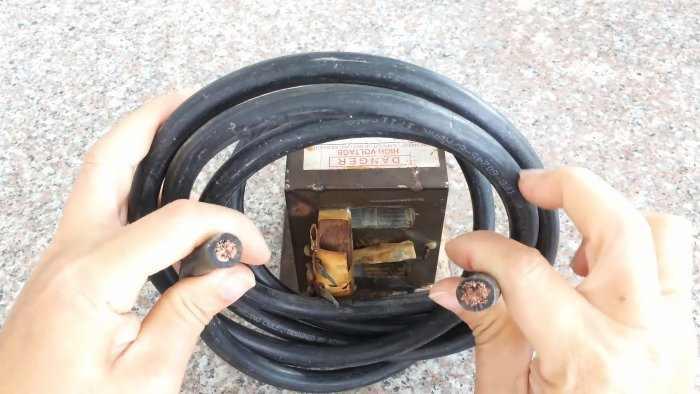
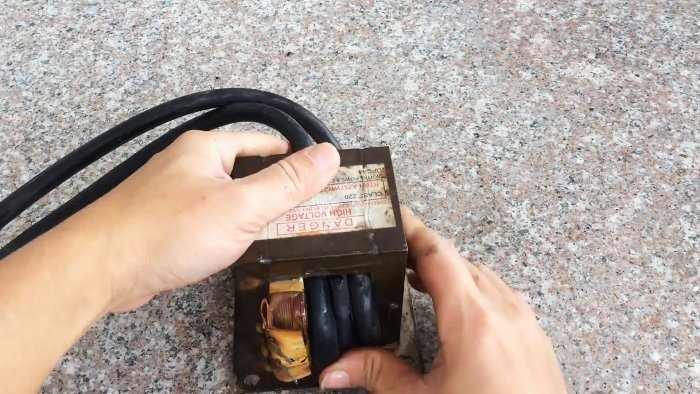
- microwave magnetron transformer;
- multicore cable in isolation;
- computer power supply case;
- legs for equipment;
- switch, wires, LED, cambric, etc.;
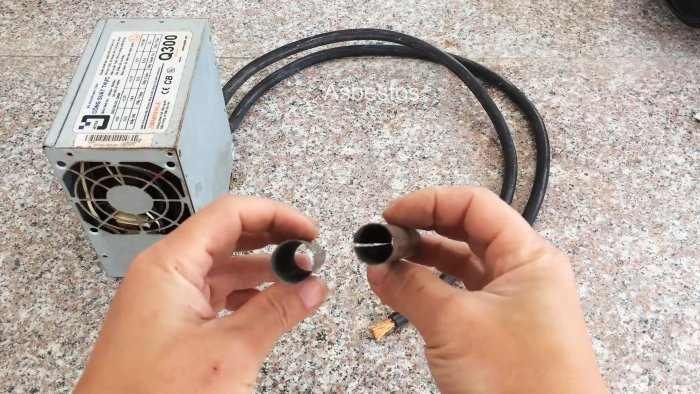
- asbestos split tubes;
- cable copper lugs for crimping;
- bolts and nuts;
- ice tongs;
- worm clamps;
- handle-bracket for carrying equipment, etc.
Tools: drill, chisel, drift and hammer, marking and measuring accessories, grinder, pliers, dowel, etc.
The manufacturing process of the apparatus for soldering and heating
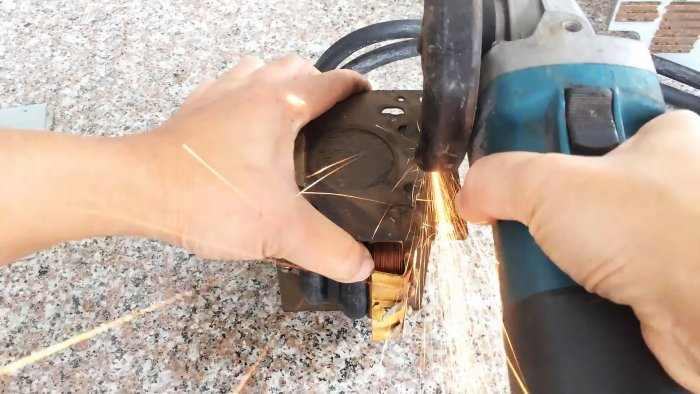
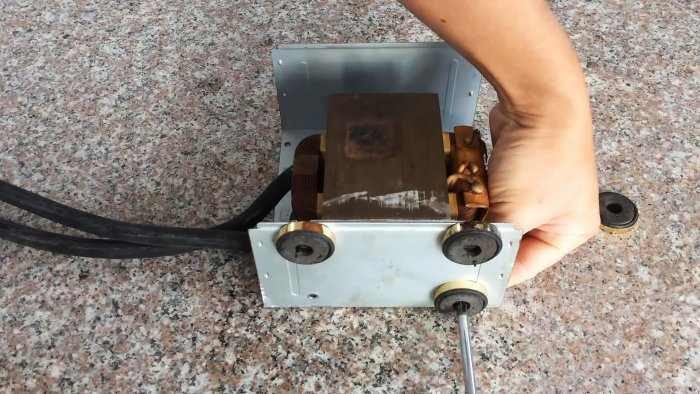
Carefully remove the magnetron transformer from the microwave so as not to damage the primary winding and magnetic circuits. We remove the secondary winding with a chisel, hammer and punch.
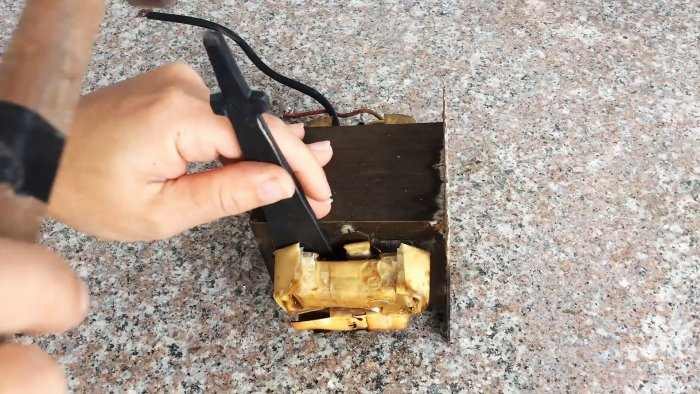
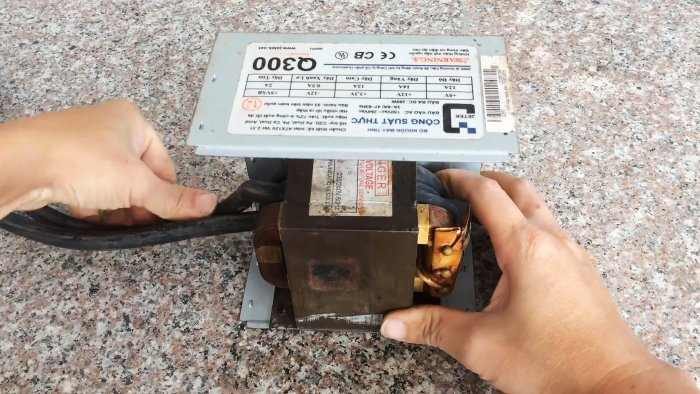
In the vacant place we place the winding of their multi-core cable in insulation until the vacated space is completely filled.
If it is difficult to pull the last loops, the cable insulation can be lubricated with oil. Pull the ends of the cable out.
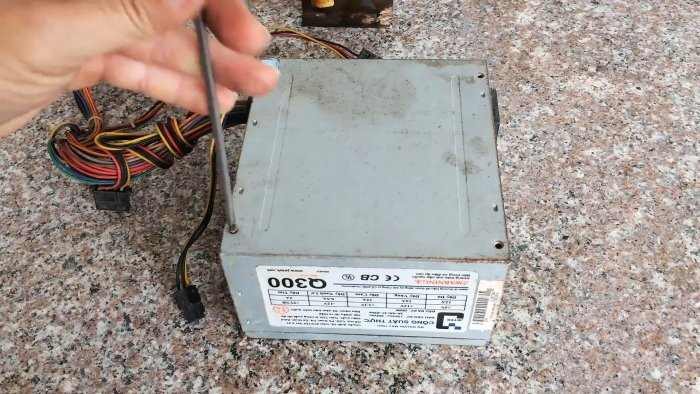
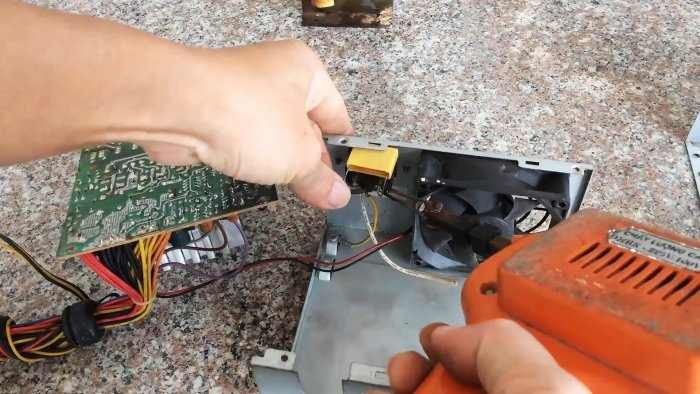
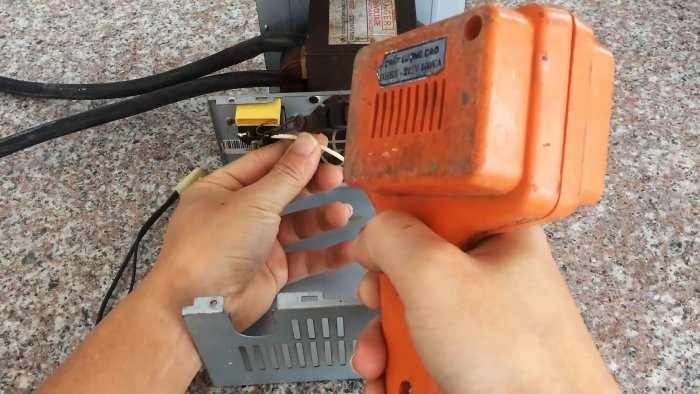
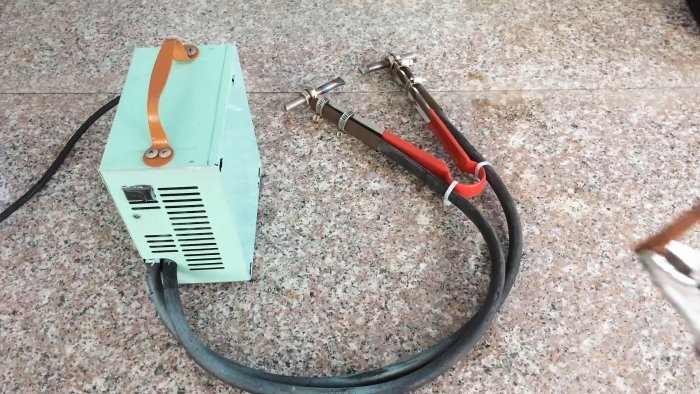
From the disassembled case of the computer power supply, we extract the electronic «stuffing», wires and a fan.
We cut off the protruding sides of the transformer mounting flange.
We drill the necessary holes, fix the transformer on the case with screws, using four support legs outside the case.
We install on the outside of the case in a convenient place a two-position switch and a control LED and a resistor. We connect them with the help of wires with cambric between themselves and the terminals of the primary winding of the transformer.
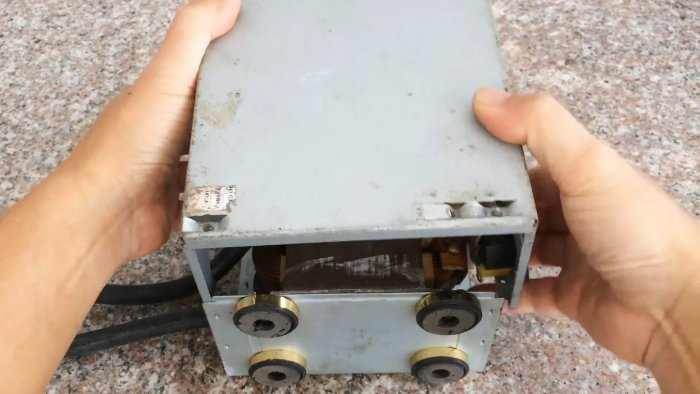
We assemble the case and fasten its parts with screws.
We clean the ends of the cable used for the secondary winding of the transformer from insulation, put on split asbestos tubes and crimp with copper lugs.
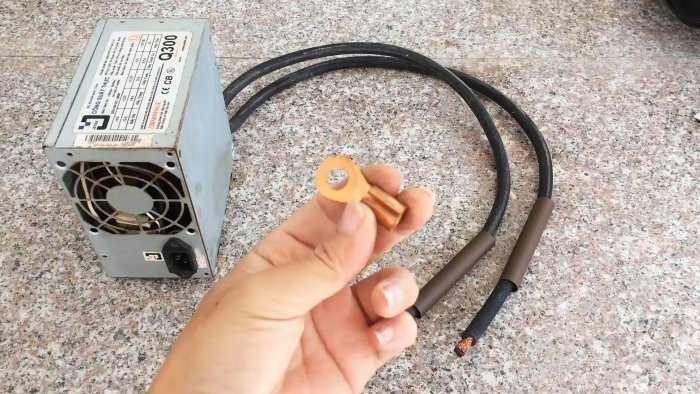
We insert the bolts into the holes of the tips until they stop into the pre-screwed nuts and tighten one more nut from above. We sharpen the ends of the bolts to an incomplete flat cone.
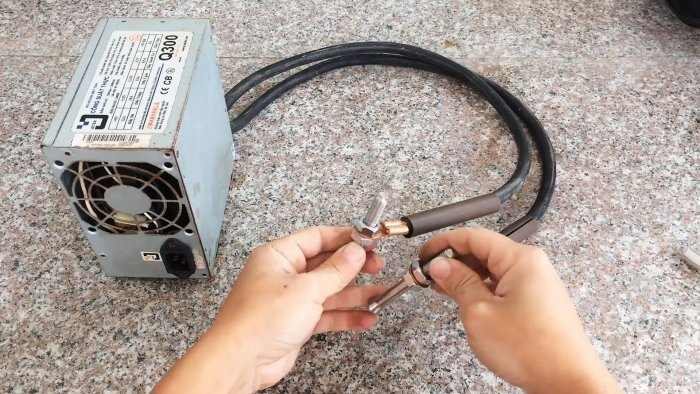
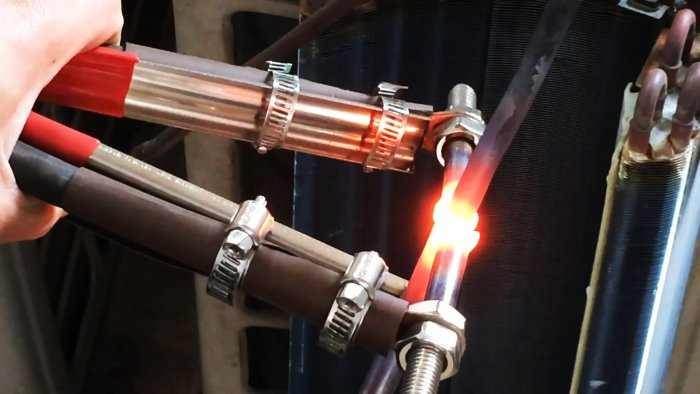
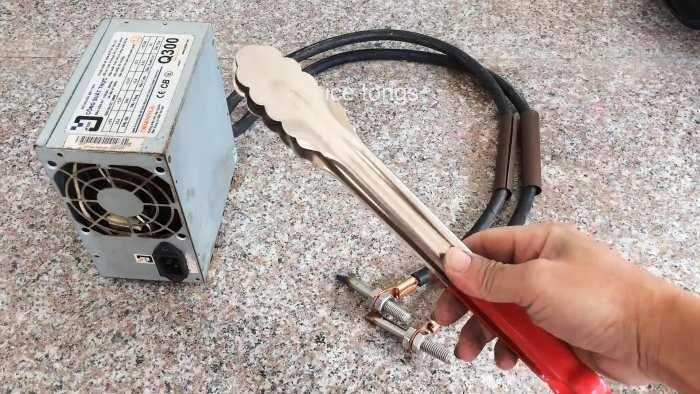
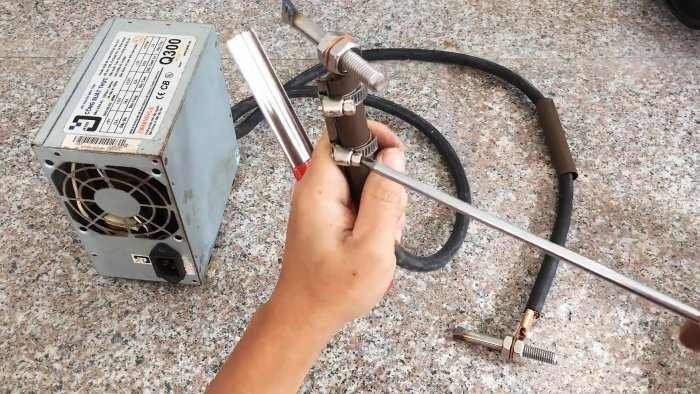
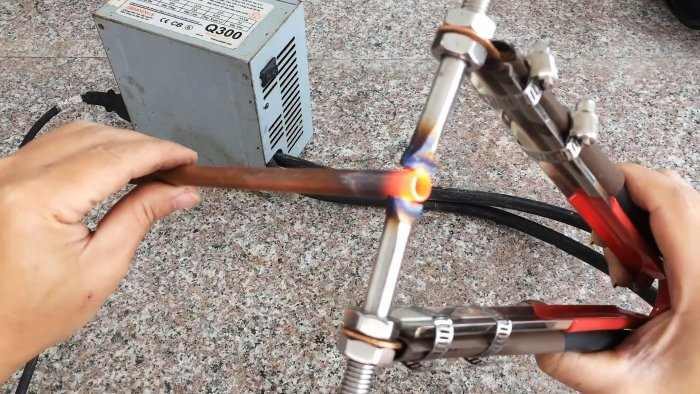
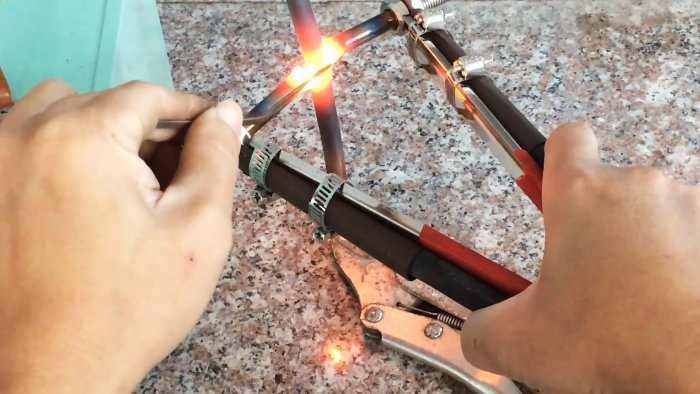
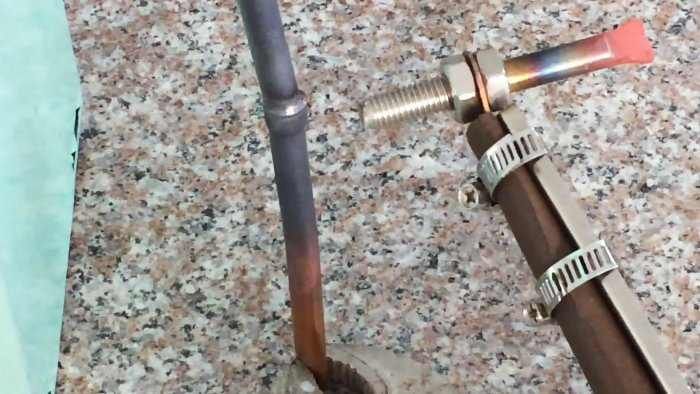
We cut off the grips from the ice tongs and firmly fasten the ends of the cable, covered with split asbestos tubes, to its handles with the help of worm clamps. Moreover, the pointed ends of the bolts should be directed towards each other and not touch in the non-working position.
We connect the power, turn on the switch, squeeze the handles until the electrodes touch the copper tubes and heat up the soldering place to a white glow, adding solder. The result is a strong, tight and reliable connection.
To give the device for soldering a marketable appearance, we paint it with spray paint, protecting the places that cannot be painted with electrical tape or adhesive tape. For ease of carrying, we fix the handle-bracket for the door or equipment from above.

I want to to thank you for this very good read!! I certainly enjoyed every little bit of it. I have got you book-marked to check out new stuff you postÖ
Good post. I learn something totally new and challenging on blogs I stumbleupon on a daily basis. Its always useful to read content from other authors and practice something from their websites.